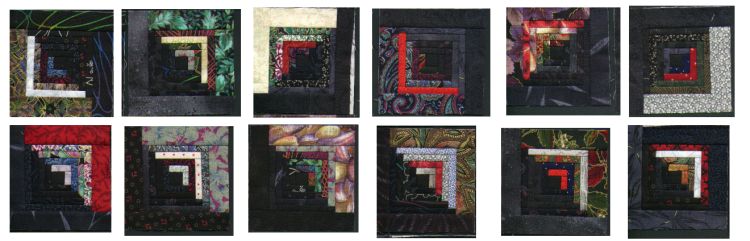
In this example, we started with images from 12 scanned fabric blocks. The blocks were scanned at 100 DPI (Dots Per Inch). If I scan photographs or something that is of photographic detail, I normally use 300 DPI.
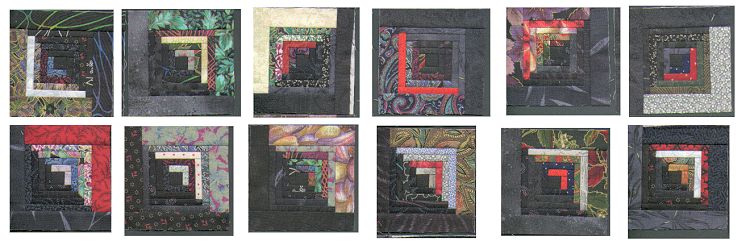
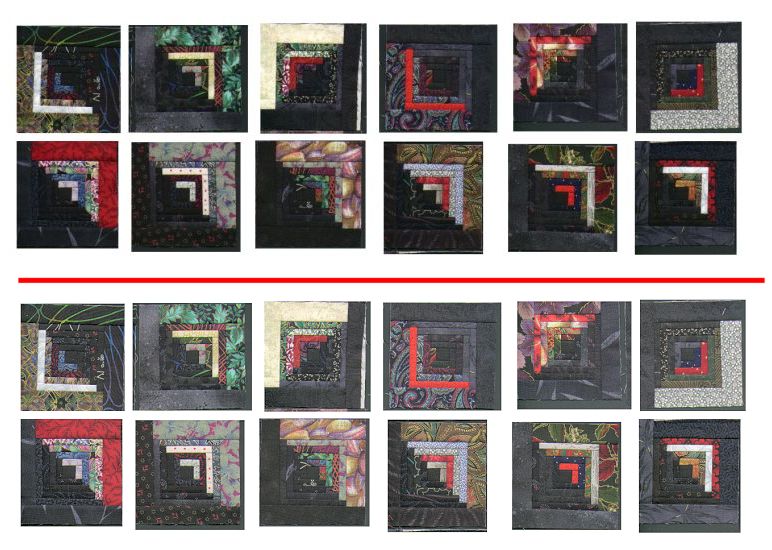
The blocks came in as shown in the first picture, below. Once into the PC and PaintShop Pro, we used PaintShop Pro's default for contrast modification of the images as shown in the second picture, below. The third picture is a repeat of the two next to each other to show the difference. The difference for some images (such as photographs at 300 DPI) can be quite significant and using the default image contrast support provided in PaintShop Pro Version 7 can be of much help.
The blocks have a portion of fabric around the "real" block. This extra portion of fabric is not needed for our PC situation -- we are not going to sew the pieces together: We simply place the real block next to another real block -- using PaintShop Pro.
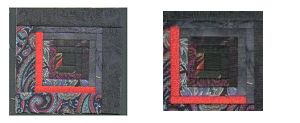
We use PaintShop Pro to crop the scanned image to what we want, as shown below. The original image is on the left, the cropped block we want is on the right.
Next, we want to put the blocks into a design that the customer can view to get a feeling for what the piece will eventually look like when sewn together.
To do this, we will have to rotate/flip/mirror the scanned/cropped block to place the adjacent blocks in the correct place.
The two pictures, below, show a start to putting the blocks in desired position.


Now, although we don't have all the blocks that will be eventually sewn together (we are working with 12 blocks, in this example; there will be around 400 blocks in the final piece), we can use PaintShop Pro to copy/paste sections of the piece into the desired position.
The customer, then, can see the eventual effect as shown below.
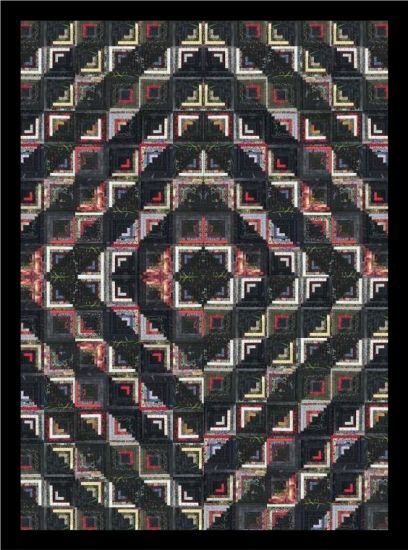
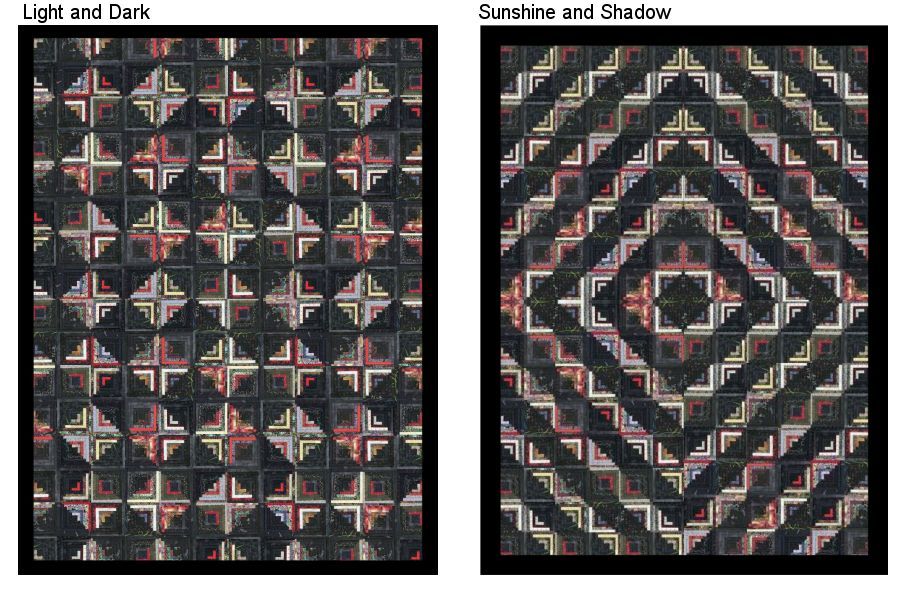
We, then, can make a second option as shown below.
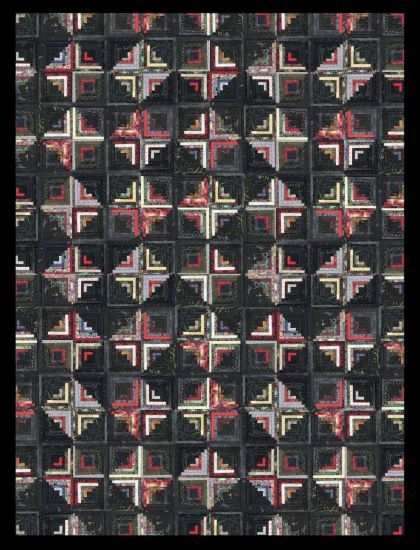
Lastly, we can put the two options together in one picture and annotate the image to assist in discussions with the customer.
The PC exercise took less time than the sewing -- and, the PC exercise assisted in discussions with the customer -- but, to be honest: The sewn piece, when finished, is more "beautiful" than the PC image! A scanner or, even, a photograph cannot match reality.
However, the approach shown can assist in decision-making.
Let me know which of the two options you would have selected! If neither of the above are OK, there are other traditional log cabin pattern options, all based on the same block's format.
---------------
To contact me about anything on this Web page, please:
send mail to: SCScompA@aol.com
------------------------------
To return to SCScompA's newsletter February 2001 page click on: SCScompA March 2001 newsletter or go to any of the pages pointed to in the SCScompA frame at the left of this panel.