This months examples are scanner-oriented as well as pictures taken using a 1.3 megapixel digital camera.
Three different situations are involved this month:
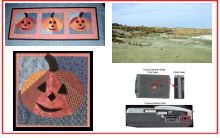
Here is a collage of some pictures from this month's example.
The photographs shown in this example are in the PC as a result of being obtained from a digital camera or from scanning a photograph. The following pictures default to digital camera origin and, if not, the shown picture will be identified as a scanned image. If digital camera, the photograph has been taken at an Olympus Camera "HQ" setting of 1.3 megapixels (1280 x 960), with some pictures having been taken at less pixel detail ("SQ") 0.3 megapixels 640 x 480). In many cases, even if the digital picture was taken at these-mentioned sizes, the picture has been resized for showing on PC screens. I try to keep most images to have a maximum height of 600 pixels for PC-display. I use Paint Shop Pro (from JASC) as my primary application for modifying/resizing/coming photographic images into one image (photo).
Scanned photographs are scanned at 300 PPI (Pixels Per Inch), 150 or 100 PPI, and the chosen PPI will be identified in the comments for that particular image.
The following is aimed at showing examples of using the PC, digital cameras, and perhaps scanners, as part of home PC environment. Hopefully, the shown pictures will give you some ideas for your home use of PCs.
Contact SCScompA if you have any comments/questions regarding anything that is shown in this Web page.
We have talked in earlier newsletters about how important it is (and, in some cases: difficult to do!) to hold the camera steady when using any camera as you take a picture. Some cameras are quite good at taking unsteadiness into consideration, some are more sensitive.
I was recently given a tripod for use with my digital camera and I have started using it when appropriate/convenient to use.
|
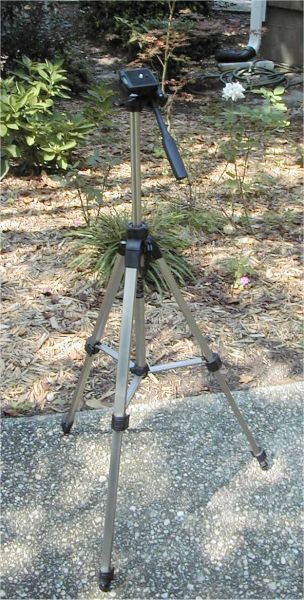
The Tripod I Use |
|
|
|
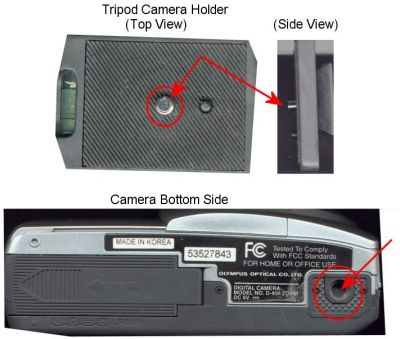
The cost of such a tripod is about $40 USA maximum and so far, in my testing, has been of good value. The legs of the tripod are easily adjustable (collapse) allowing for the camera to be positioned at various levels (6 foot eye level down to about a two foot level). The carrying weight of the tripod is very light; however I doubt if I would carry it places I take pictures while being active (such as when I play golf). The tripod is easily set up for use. There is an attachment that clicks into the top of the tripod and is screwed into the bottom of the camera.
|
As I mentioned earlier in the Web page, I probably will not carry the tripod with me when the camera is an accessory -- but if the camera is a major reason for my going somewhere I definitely will make use of the tripod.
Following are two pictures that were taken while the camera was attached to the tripod. The first is a "long range" shot while the second is a "close-up".
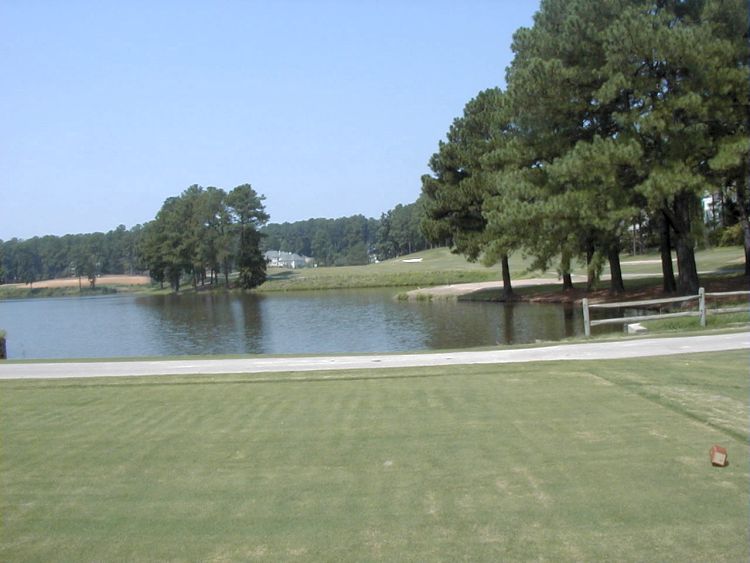
Another Golf Picture
I know I use the golf course a lot for my examples -- but the wide, expansive views fit the example. The camera was held steady by the tripod and removing the "don't move the camera" option from the taking-a-picture exercise was a comfort!
Download size of the image is: 59Kb
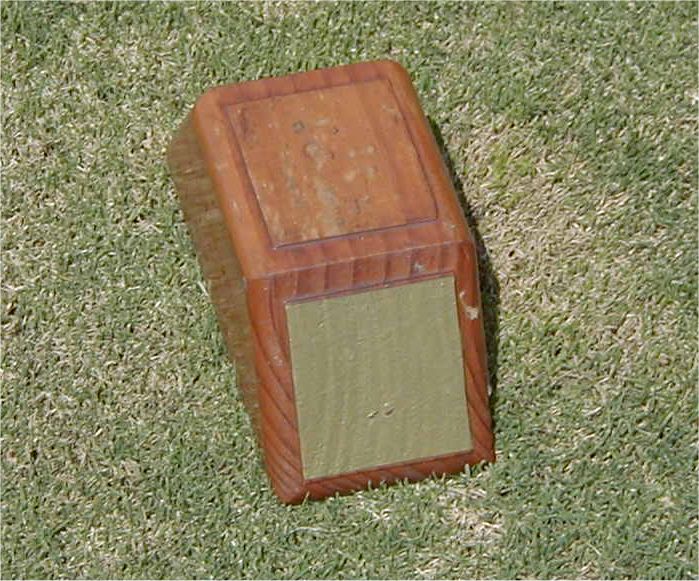
A Close-up Image
Not very exciting -- a golf hole tee marker -- but once again the camera was held steady by the tripod.
Download size of the image is: 113Kb
If you have not already done so, give a tripod a try as you make use of your camera.
Once again, this past month, I had a reason to scan some cotton fabric that is part of some quilt work. I also took a photo of the quilt that contained the scanned quilt block.
Both scanning and picture taking have their place and can be of value/interest in working with quilts and other art pieces.
First, a scanned block from the small quilt.
This was originally scanned at 300 BPI density. The original to-be-scanned block was about 11.25 inches square. My scanner bed (scanning area) is 8.5 inches wide, so at one scanning I would need to scan just part of the block -- and, that is what I did. It happens that the important part of the block is less that 8.5 inches, so that fit on the scanner bed.
If I had needed to scan the complete block I would have scanned the block in multiple scans, repositioning the block (fabric) for each of the multiple scans.
In any case, scanning at 300 pixels per inch results in over 3000 pixel-wide image. If I wanted to print the image: OK! I could keep it at this over-3000 pixel width.
However, I want to view the block on the PC -- so I resized that for showing as below (at 600 pixel width).
I find that limiting the images to around 750 pixel width and a max of 600 pixel height is good for PC viewing. Many PC displays are certainly able to handle comfortably wider than 750 pixels -- for example, my PC's display accepts 1000 pixel wide images very well; but, my laptop is set for a max of 800.... so I find that 750 wide max is a nice compromise.
The same discussion pertains to an image's height -- and I use 600 pixels as a comfortable height maximum for images shown on PC/laptop displays.
I used PaintShop Pro to place the black "border" around the scanned block.
The following image is 600 pixels wide, 600 pixels high with a total disk (download) size of 96 KB. Assuming you are connected via a dial-up modem with 56KB modem at about 49000 BPS connection speed, you should see the following image in about 96000x10/49000 = 19 seconds! (Why the "10" in the formula???? It has to do with "computer bits". Don't worry about that -- or ask someone who knows computers!). In any case, here is the photo:
Download size: 96 KB.

Next, I show a picture of the completed small quilt top that contains the above-shown block. The quilt is about 40 inches wide. The picture was taken at my Olympus camera's HQ (1.3 megapixel) detail and was 203 KB size on the computer hard disk. I, then, resized the picture to be as below, at a width of 750 pixels.
After resizing, the download size: 71 KB.
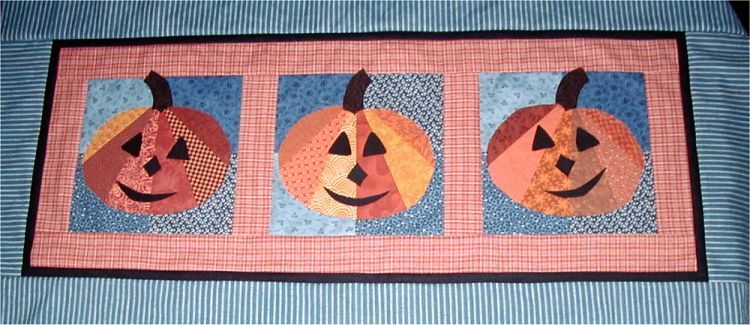
The photo/picture image, above, was not "enhanced" once in the PC other than using PaintShop Pro's Image-->Auto Contrast feature. The same was true of the earlier-shown scanned image.
For detail showing, a scan approach is very usable. For an overall view, the camera/picture-taking method is certainly better and quicker than scanning.
In any case, as your home computing moves forward, keep in mind use of your scanner -- as well as continued use of your digital camera. Both approaches have their place in your home computing.
If you are interested in quilt Web pages, I have been working on one at:
http://members.aol.com/scsdesigns/scsdesigns.htm
If you wish to go directly to the above web page, click on the following (Use your Web browser's Back button to return to here): A Quilt-Oriented Web Page from SCS Designs
Give it a look if you have time. I am interested in any of your comments.
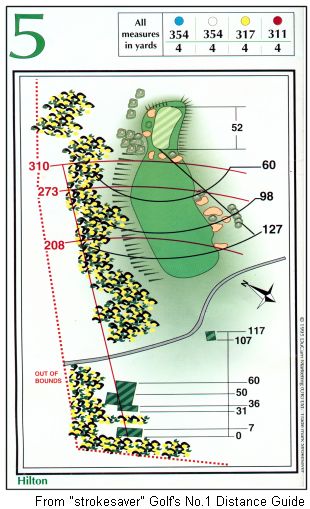
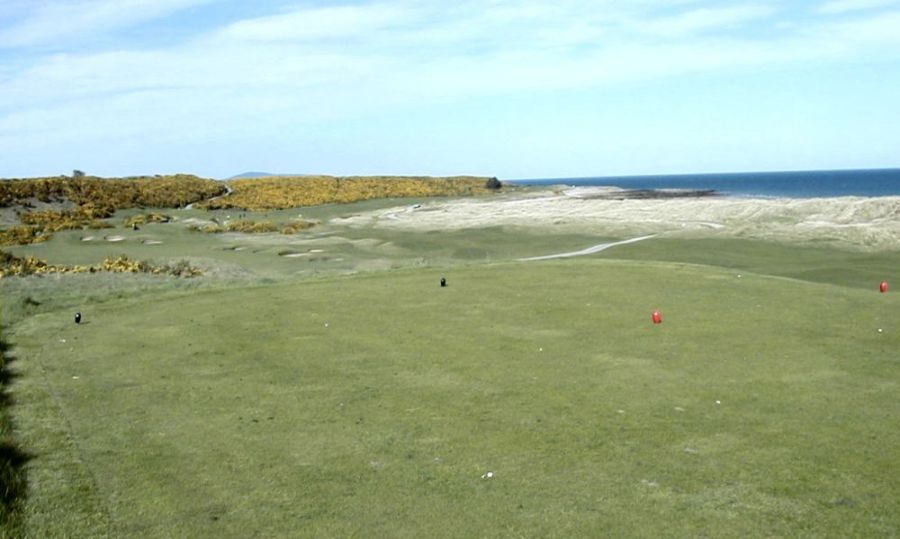
Another fine par 4 at Royal Dornoch Golf Club in Scotland. The pictures were taken in April, 2002. The information shown regarding the golf hole's distances, etc. is a scanned image from "strokesaver, Golf's No. 1 Distance Guide". You may purchase "strokesaver" at most golf courses in Scotland.
|
5th Hole - Hilton - Par 4 317 Yards A wonderful, short, par 4. After the drive, the second shot is to an elevated/mounded green that is difficult to hold. Greenside trap/"collection areas" capture any imprecise shot. You have to stay clear of the gorse and rough on the left -- and that is not easy as anything on the left side of the fairway will roll to the left. A difficult driving and second shot hole for players from the front tees. |
|
The players you see in this picture on the back-right side of the 5th green are "heading home", playing the 11th hole.
After playing the 5th and 6th holes, you head up the path shown in this picture to play the 7th hole at the top of the hill.
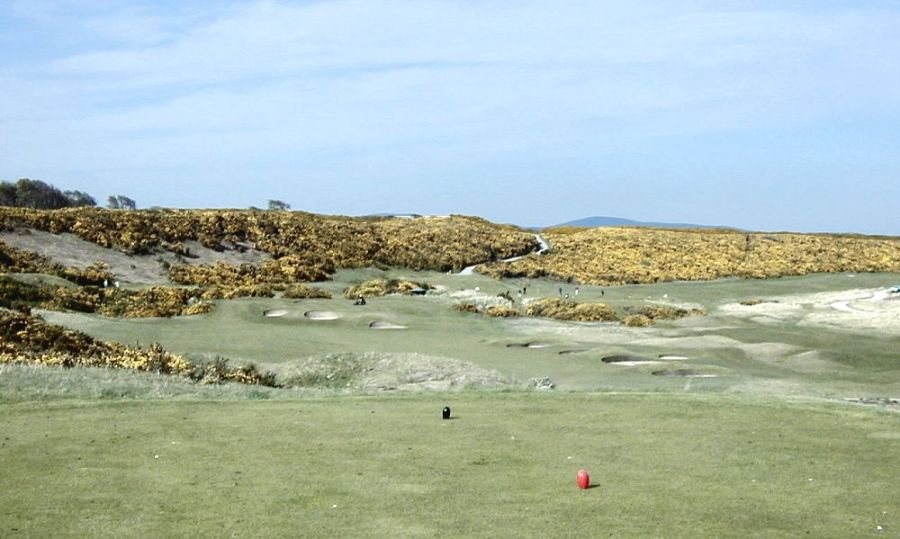
This is the same view, not "zoomed" by the camera lens.
.........
Let me know if you have played -- or expect to play in the future -- the above golf hole.
I wish you well in your picture taking and travels or other activities -- and hope you share that with a journal and Web-type of presentation you share with family/friends.
---------------
To contact me about anything on this Web page, please:
send mail to: SCScompA@aol.com
------------------------------
To return to SCScompA's newsletter August 2002 page click on: SCScompA August 2002 newsletter or use your Web browser's Back button.